
SIDE TABLE - IRON & PLYWOOD
My projects come in waves—some out of necessity, others sparked by a moment of inspiration, and sometimes just because I get the itch to make something. This side table falls into that last camp. It wasn’t born from any pressing need—just a sketch I had drawn while thinking of other pieces, mostly in metal. But like most things I build, it eventually found its place. It now lives in my office—part plant stand, part landing pad for my laptop and spare items, and, most importantly, a sun-drenched perch for my cats to soak up the southern light.
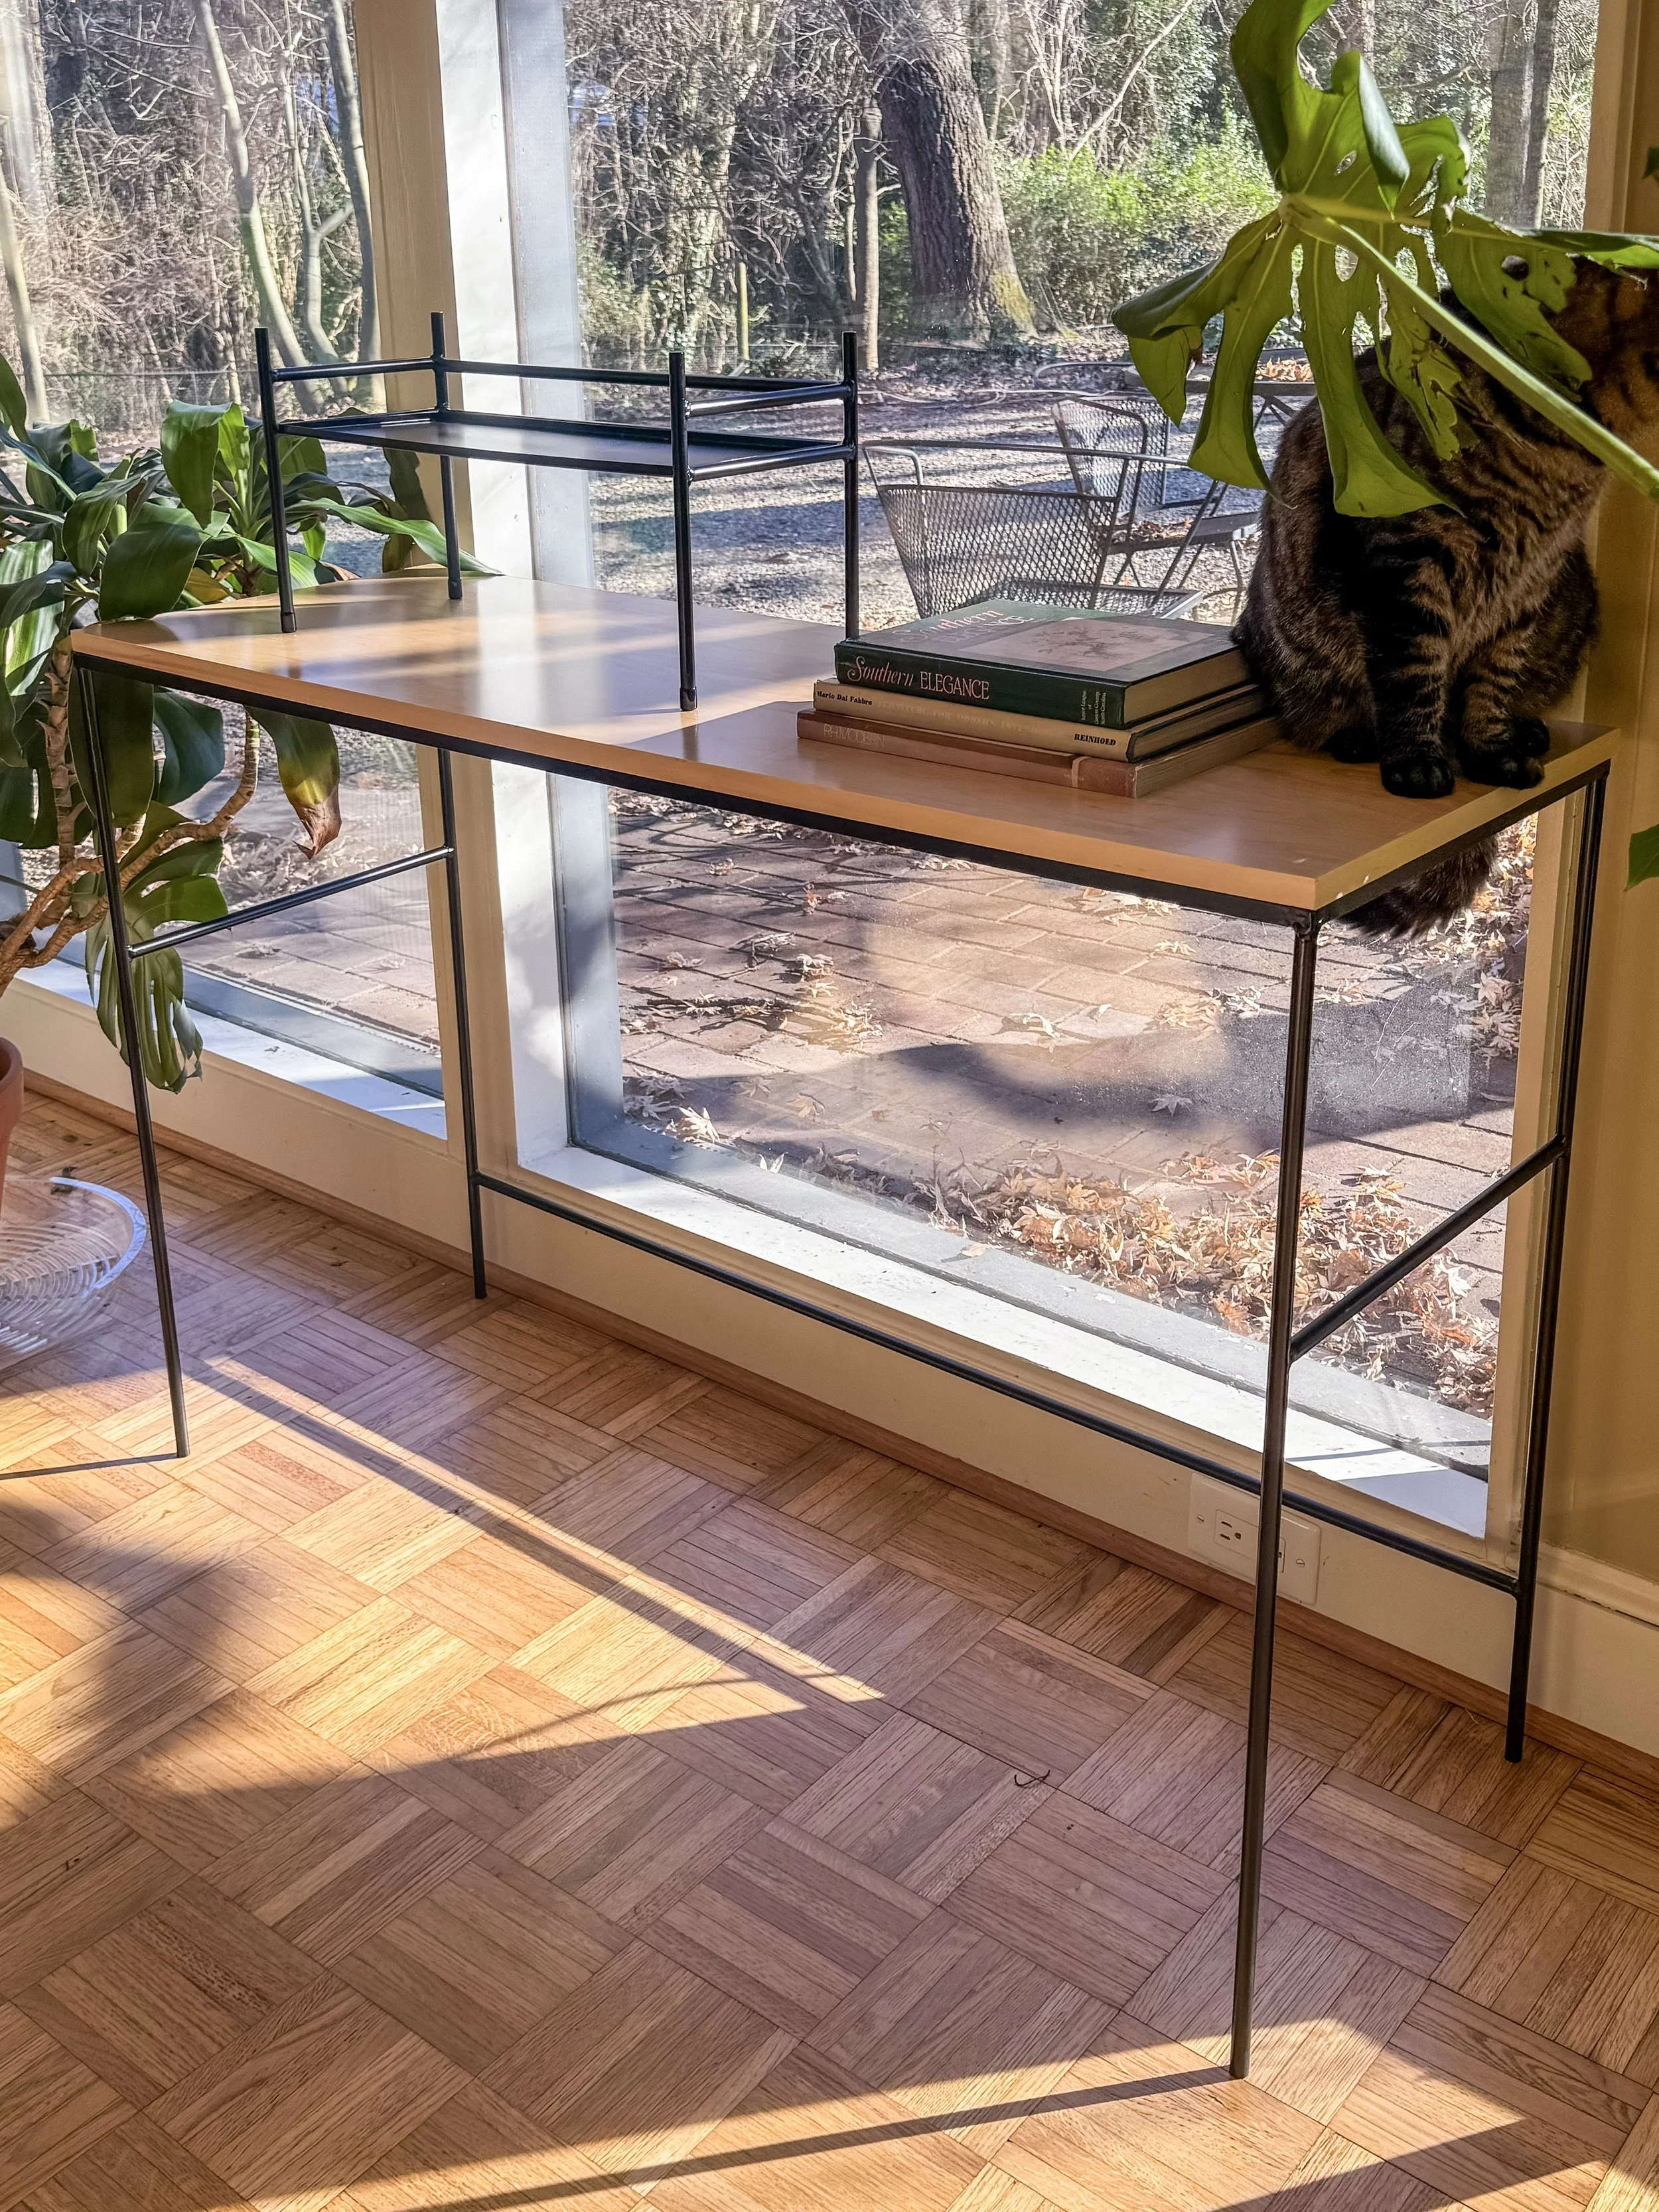
At first glance, you might mistake it for something from Paul McCobb’s Planner Group—but it’s not. However McCobb’s influence is all over it. His clean, pared-down, industrial-but-warm aesthetic was the north star. When the Planner Group launched in 1949/50, it took off like a rocket. But McCobb’s name—despite his impact—never quite reached the household status of Eames or Nelson. His work was grounded: modular, modern, affordable for the time, and made for real homes and real lives.
Once you’ve built a piece like this, you understand why McCobb and his business partner, B.G. Mesberg—who handled manufacturing and distribution—chose straightforward materials like straight-cut wood and iron rod. They’re simple, reliable, easy to work with. And just after the war, the skills to shape them were everywhere—carpenters, welders, tradespeople who knew their way around raw materials. It was practical and for the time truly modern design within reach.
My table is built from maple plywood and a mix of round and square iron rod—materials that echo McCobb’s palette. Affordable, accessible, and beautiful in their own right. The build requires welding and cutting plywood, so I’d call it an intermediate-level project. But even with basic skills, the simplicity of the design and joinery makes it an approachable DIY mid century modern project.
Bill of Materials & Costs
The materials for this table are all easily sourced from local lumber and metal yards, with a few small bits from Amazon—nothing exotic or too hard to find.
For context, if you wanted to pick up an original McCobb piece from 1st Dibs, you’d be looking at $5,000 or more. A licensed reproduction from Karakter runs about $2,485 (and comes with the option of some lovely drawers). I thought about adding drawers, but my cabinetry game is quite poor.
The dimensions listed here are what I used, but you can easily tweak them to suit your space. I also asked my metal yard to handle the cutting. Getting exact cuts at home can be tricky, and outsourcing that step saved me a ton of time and frustration.
Final dimensions:
Length: 48 inches
Width: 15 inches
Height: 32.5 inches
Materials
Tabletop
¾” Maple Plywood (C2 Quality) – $119 for a 4’x8’ sheet (used 48” x 15”, ~15%) → $17.85
Metal Tabletop Frame
½” Square Bar (2) @ 15” → $7.59
½” Square Bar (2) @ 48” → $22.76
¼” Flat Bar (6) @ 6” (mounting plates) → $2.51
Stretchers
½” Round Bar (2) @ 15” (front to back) → $5.85
½” Round Bar (1) @ 47.1” (rear) → $9.18
Legs
½” Round Bar (2) @ 31.25” → $24.37
Other Costs
Maple Edge Banding → $19.99
Metal Miter Cutting Services → $40.00
Metal Delivery → $60.00
Rubber Feet (Set of 12, used 4) → $2.49
Rust-Oleum Satin Black Paint → $4.89
Rust-Oleum White Primer → $6.47
Screws (12) → ???
Total Cost
Metal: $182.06
Wood: $17.85
Services: $100.00
Other: $33.84
Grand Total: $333.75
Still a steal compared to the alternatives—and there's something undeniably satisfying about making it yourself.
Tools Required
Tool costs aren’t included in the build price, but here’s what you’ll generally need:
Circular Saw or Track Saw – for clean plywood cuts
Welder & Welding Table – plus mask, gloves, clamps, etc.
Right-Angle Clamps – to keep everything square while welding
Angle Grinder + Flap Discs – to clean welds and prep for paint
Metal Files – for fine-tuning the welds and edges
Screwdriver – for attaching the top
Drill Press + Step Drill Bit – for clean mount holes
Household Clothes Iron – to apply edge banding
100 Grit Sand Paper - to prep the frame for painting
Edge Banding Trimmer - for cutting excess edge banding off the table top
This is definitely a project that assumes access to a decent workshop. That said, many metal yards will handle cutting and even basic welding if you bring them a sketch or plan.
The Build Process
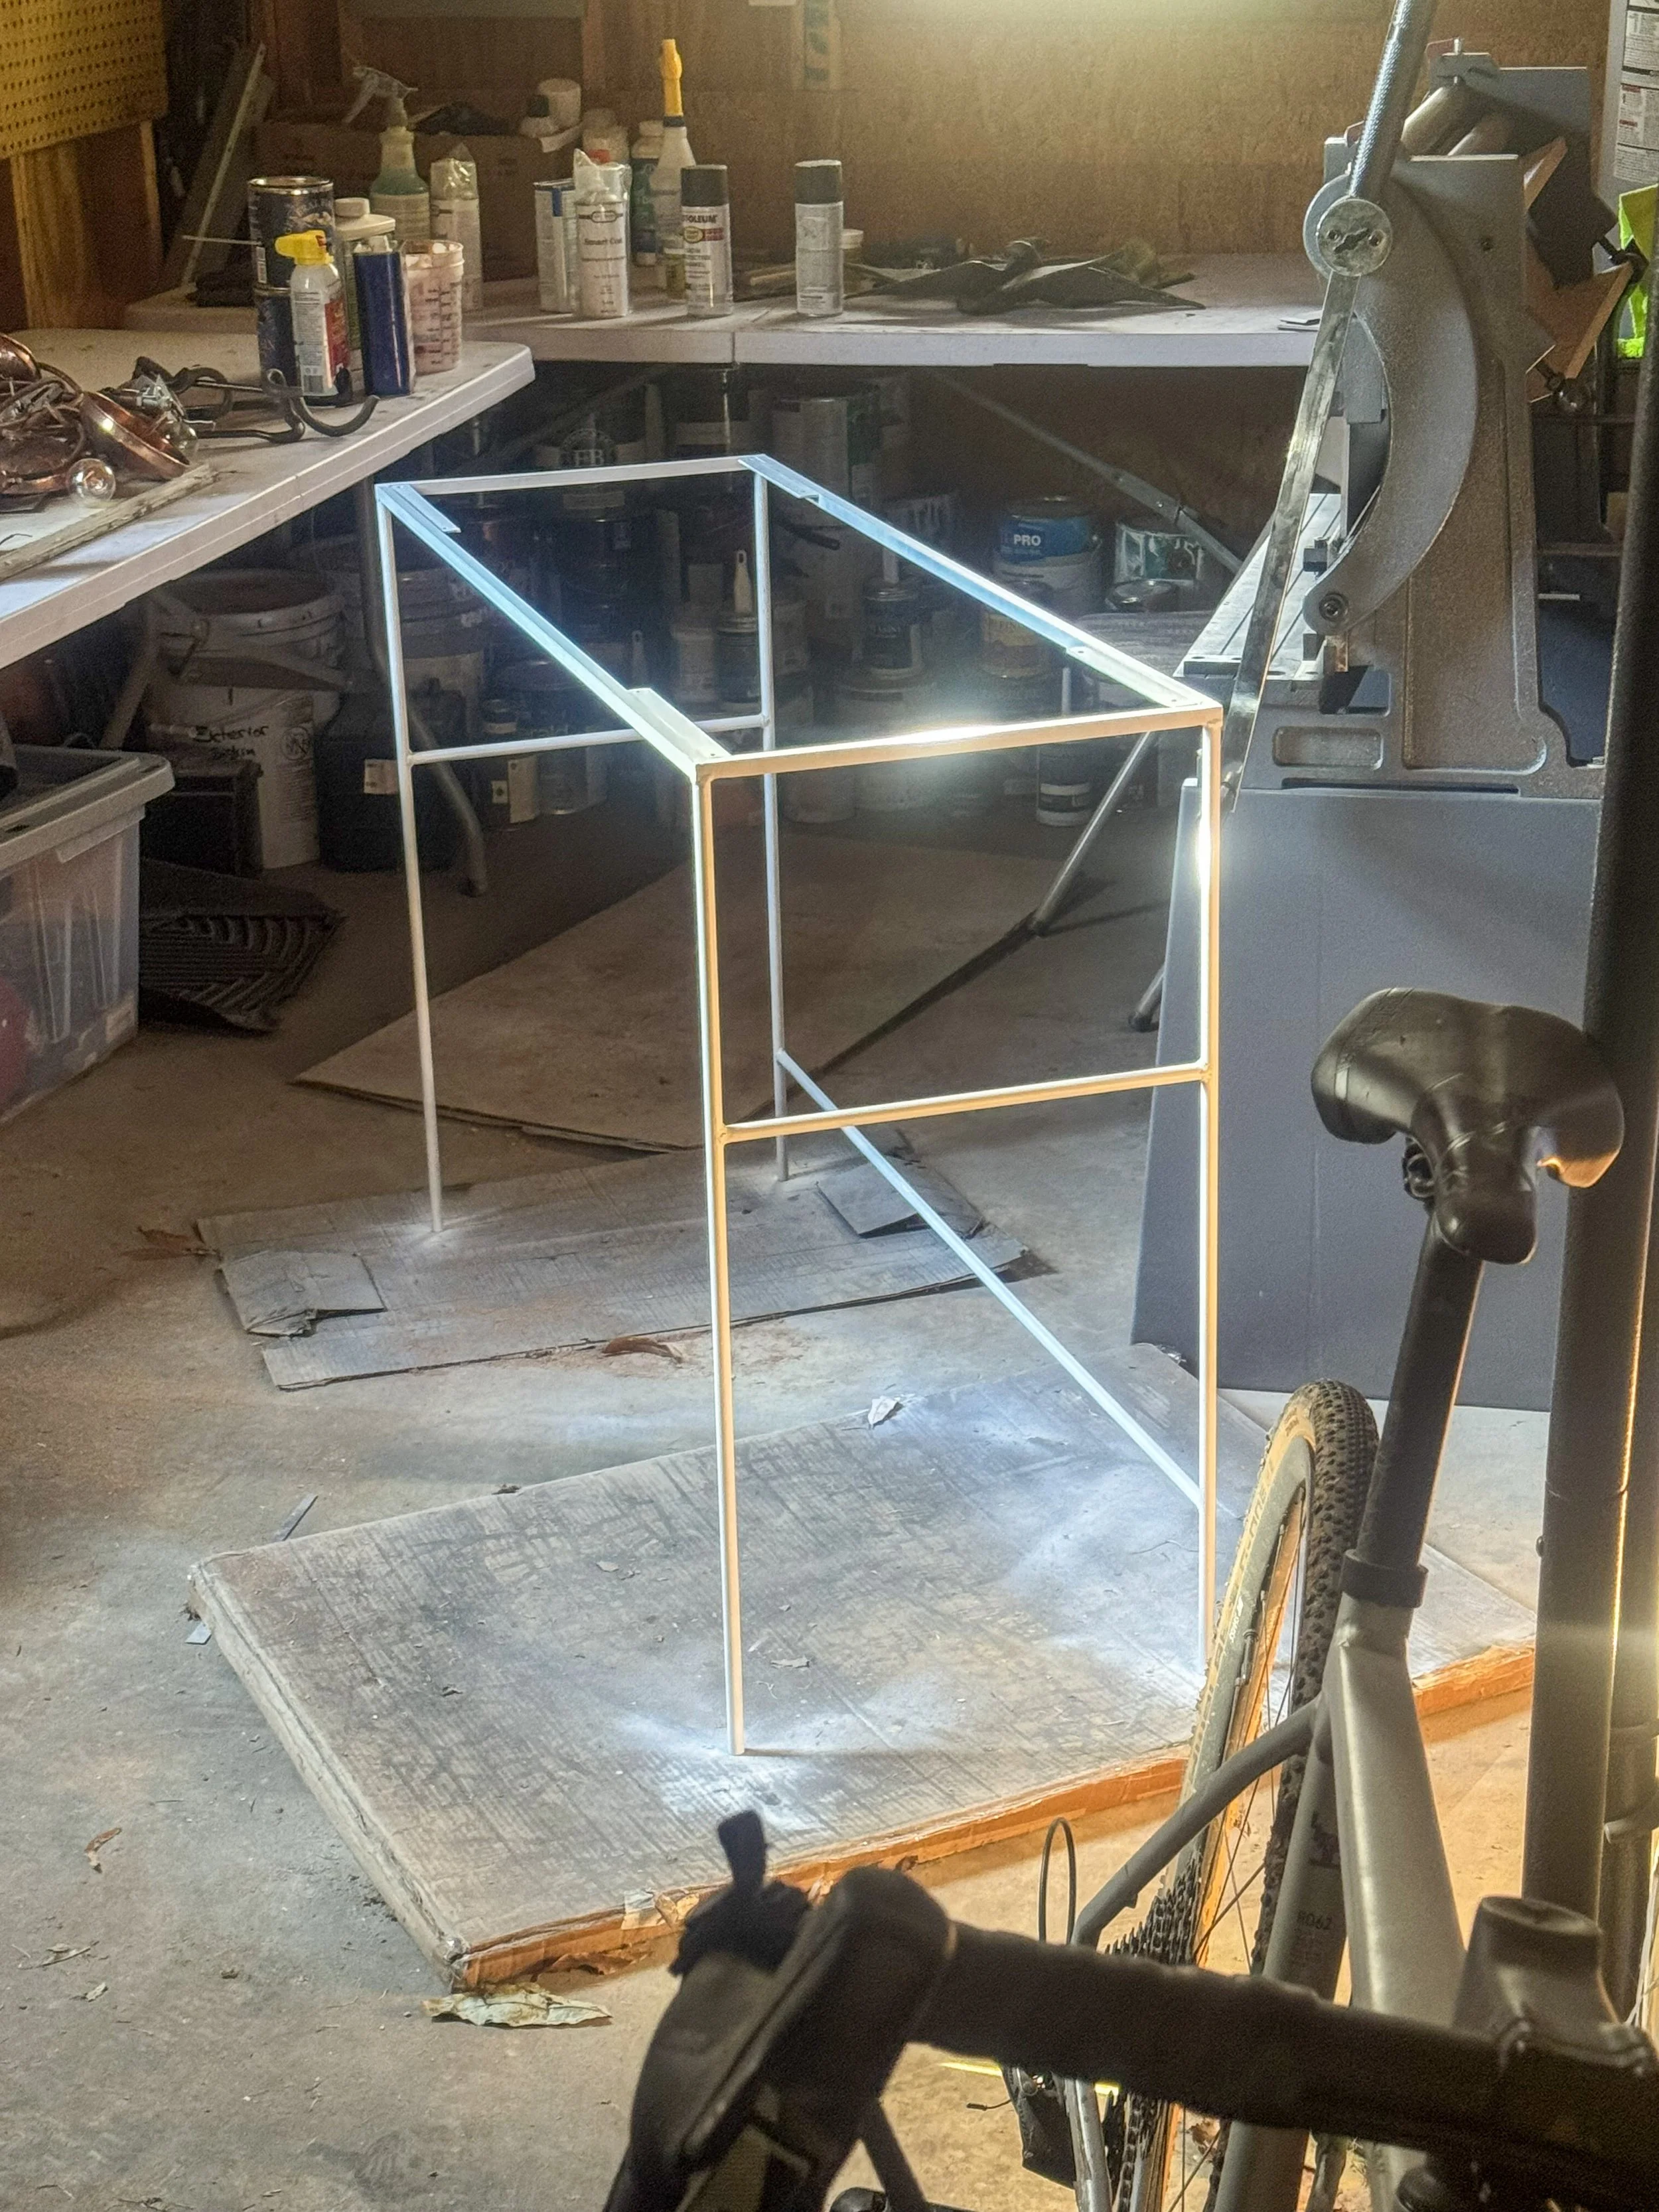
The build started on the welding table. I had the dimensions mapped out, but I wanted to fabricate the metal frame first before cutting the wood—ensuring an exact fit.
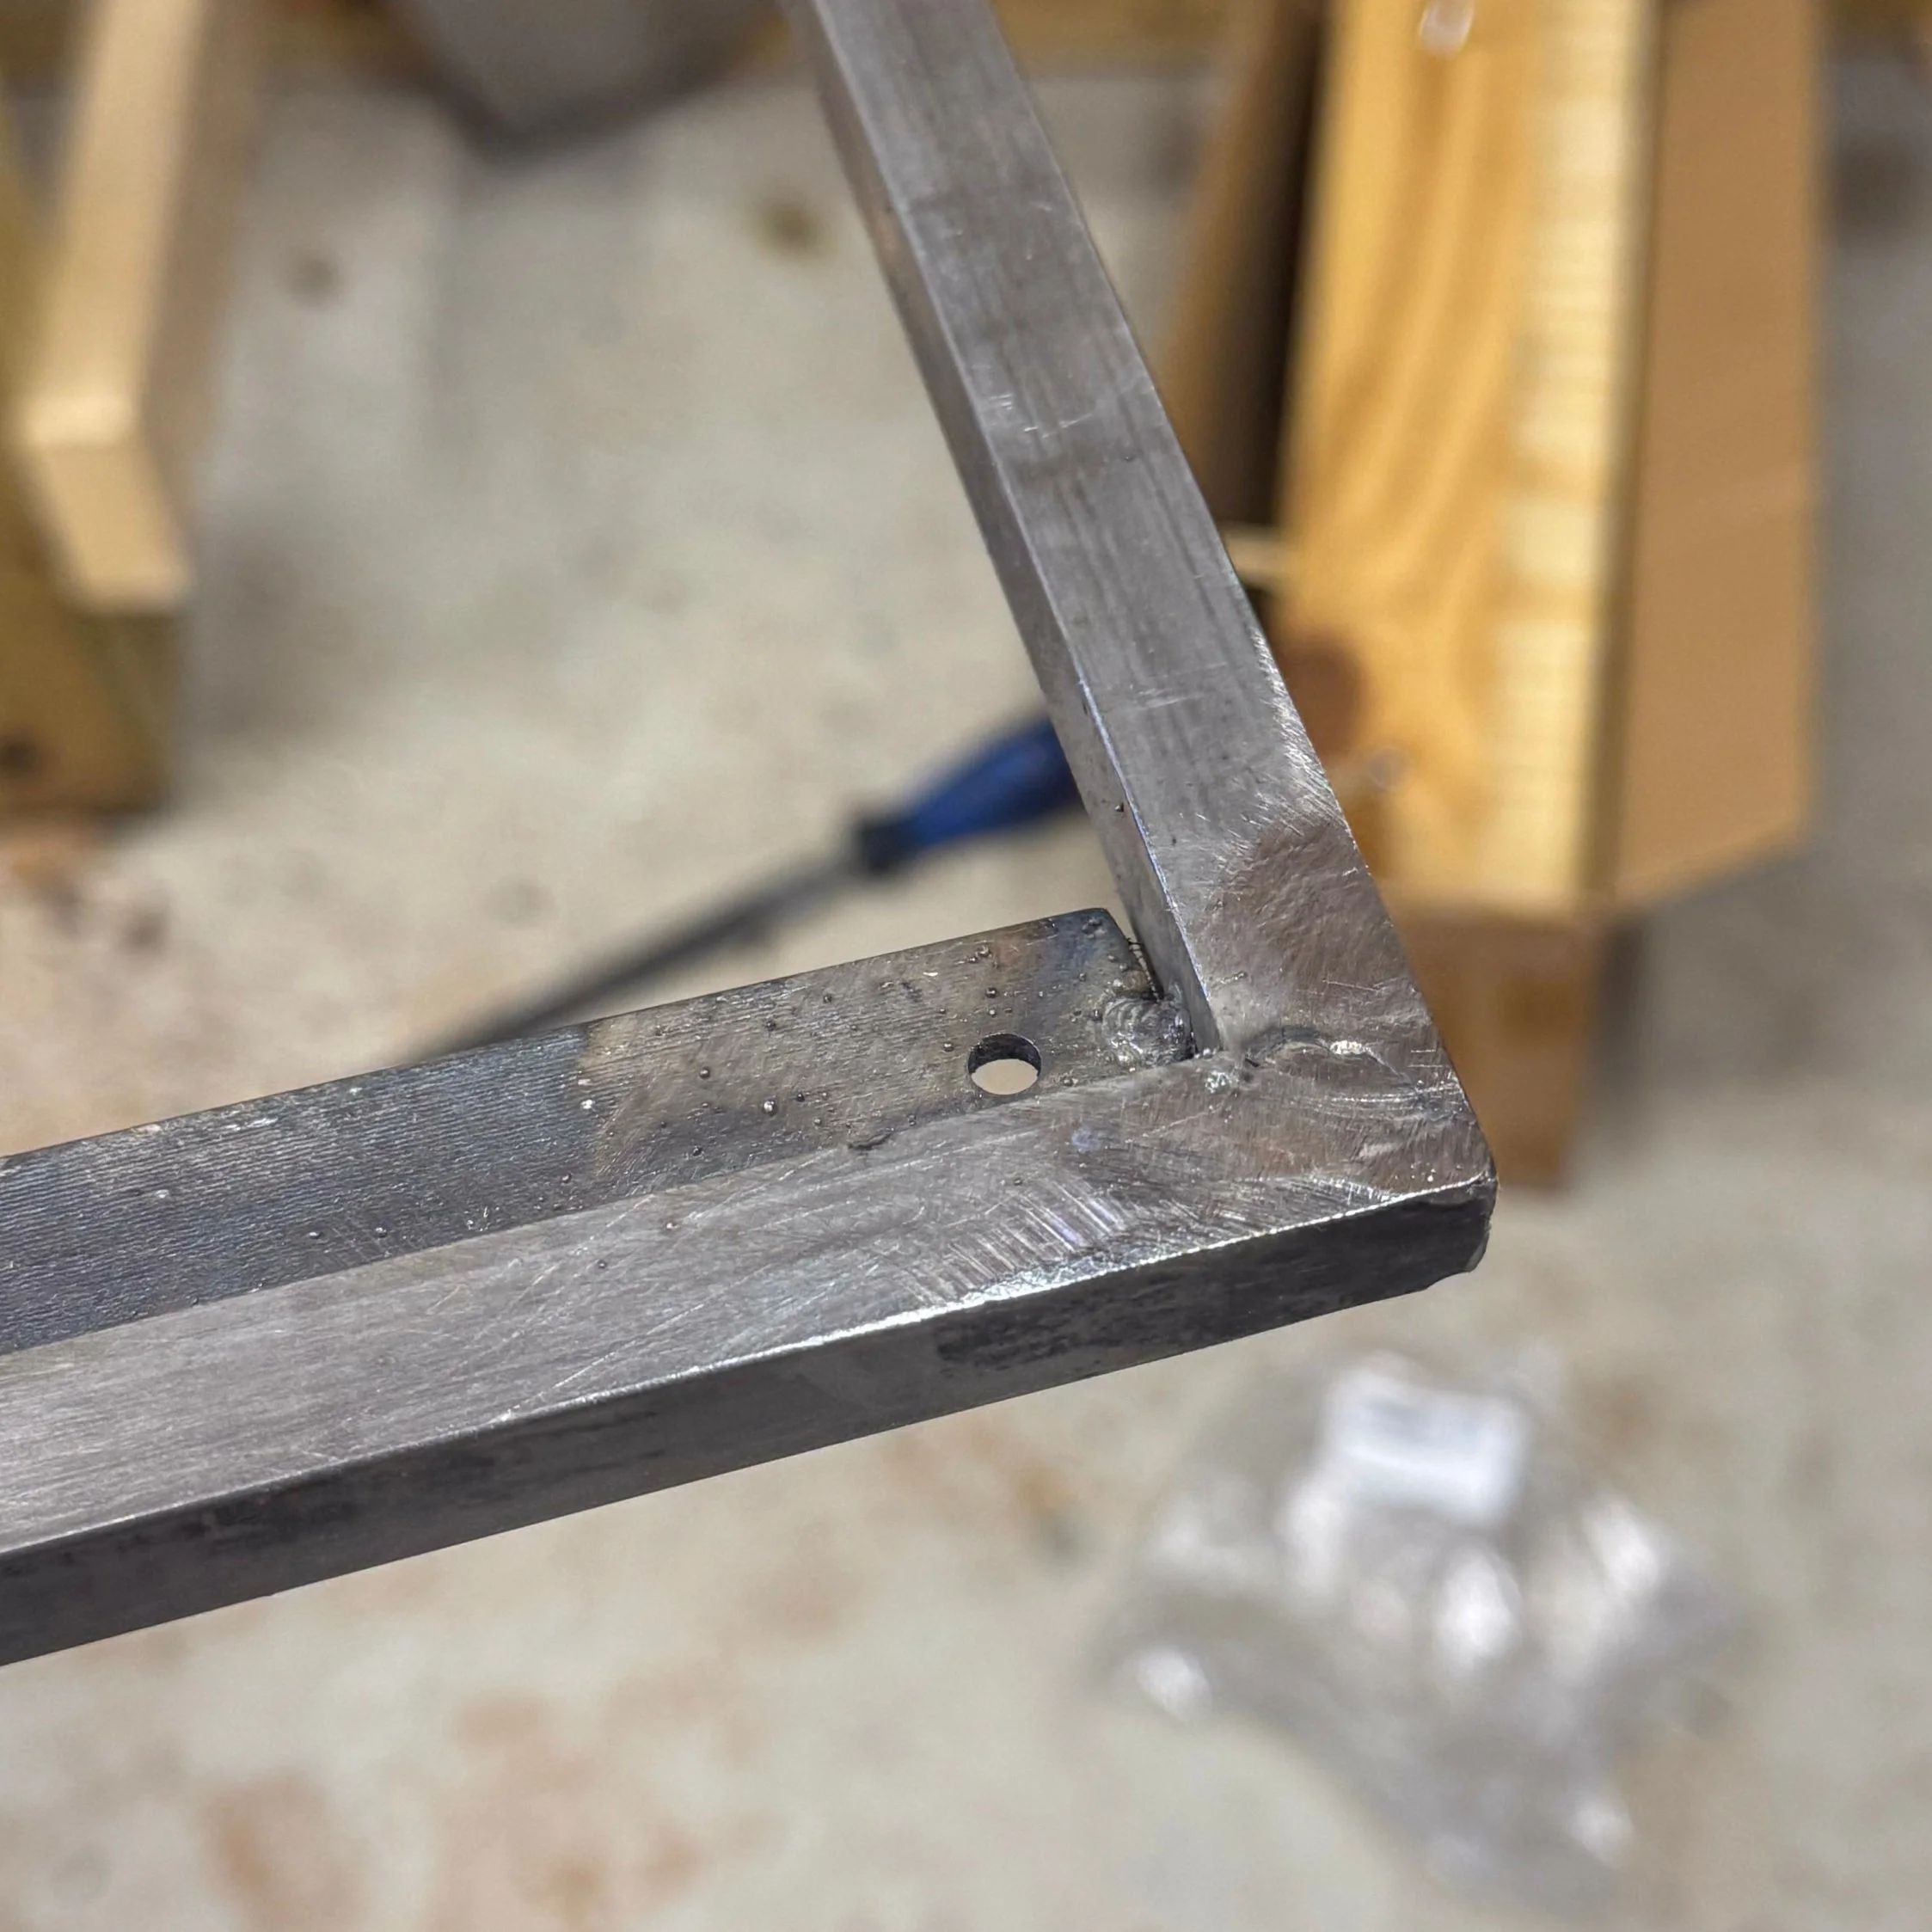
I laid out the pre-cut square bar pieces for the tabletop frame, clamped everything in place using right-angle guides, and started welding. Tack weld one corner, then the diagonal, then the other two. Once it was square and solid, I fully welded all four joints.
Next came the six flat bar mounting plates. I drilled two holes in each using the drill press—one in each corner of the frame, plus two across the middle span for extra support.
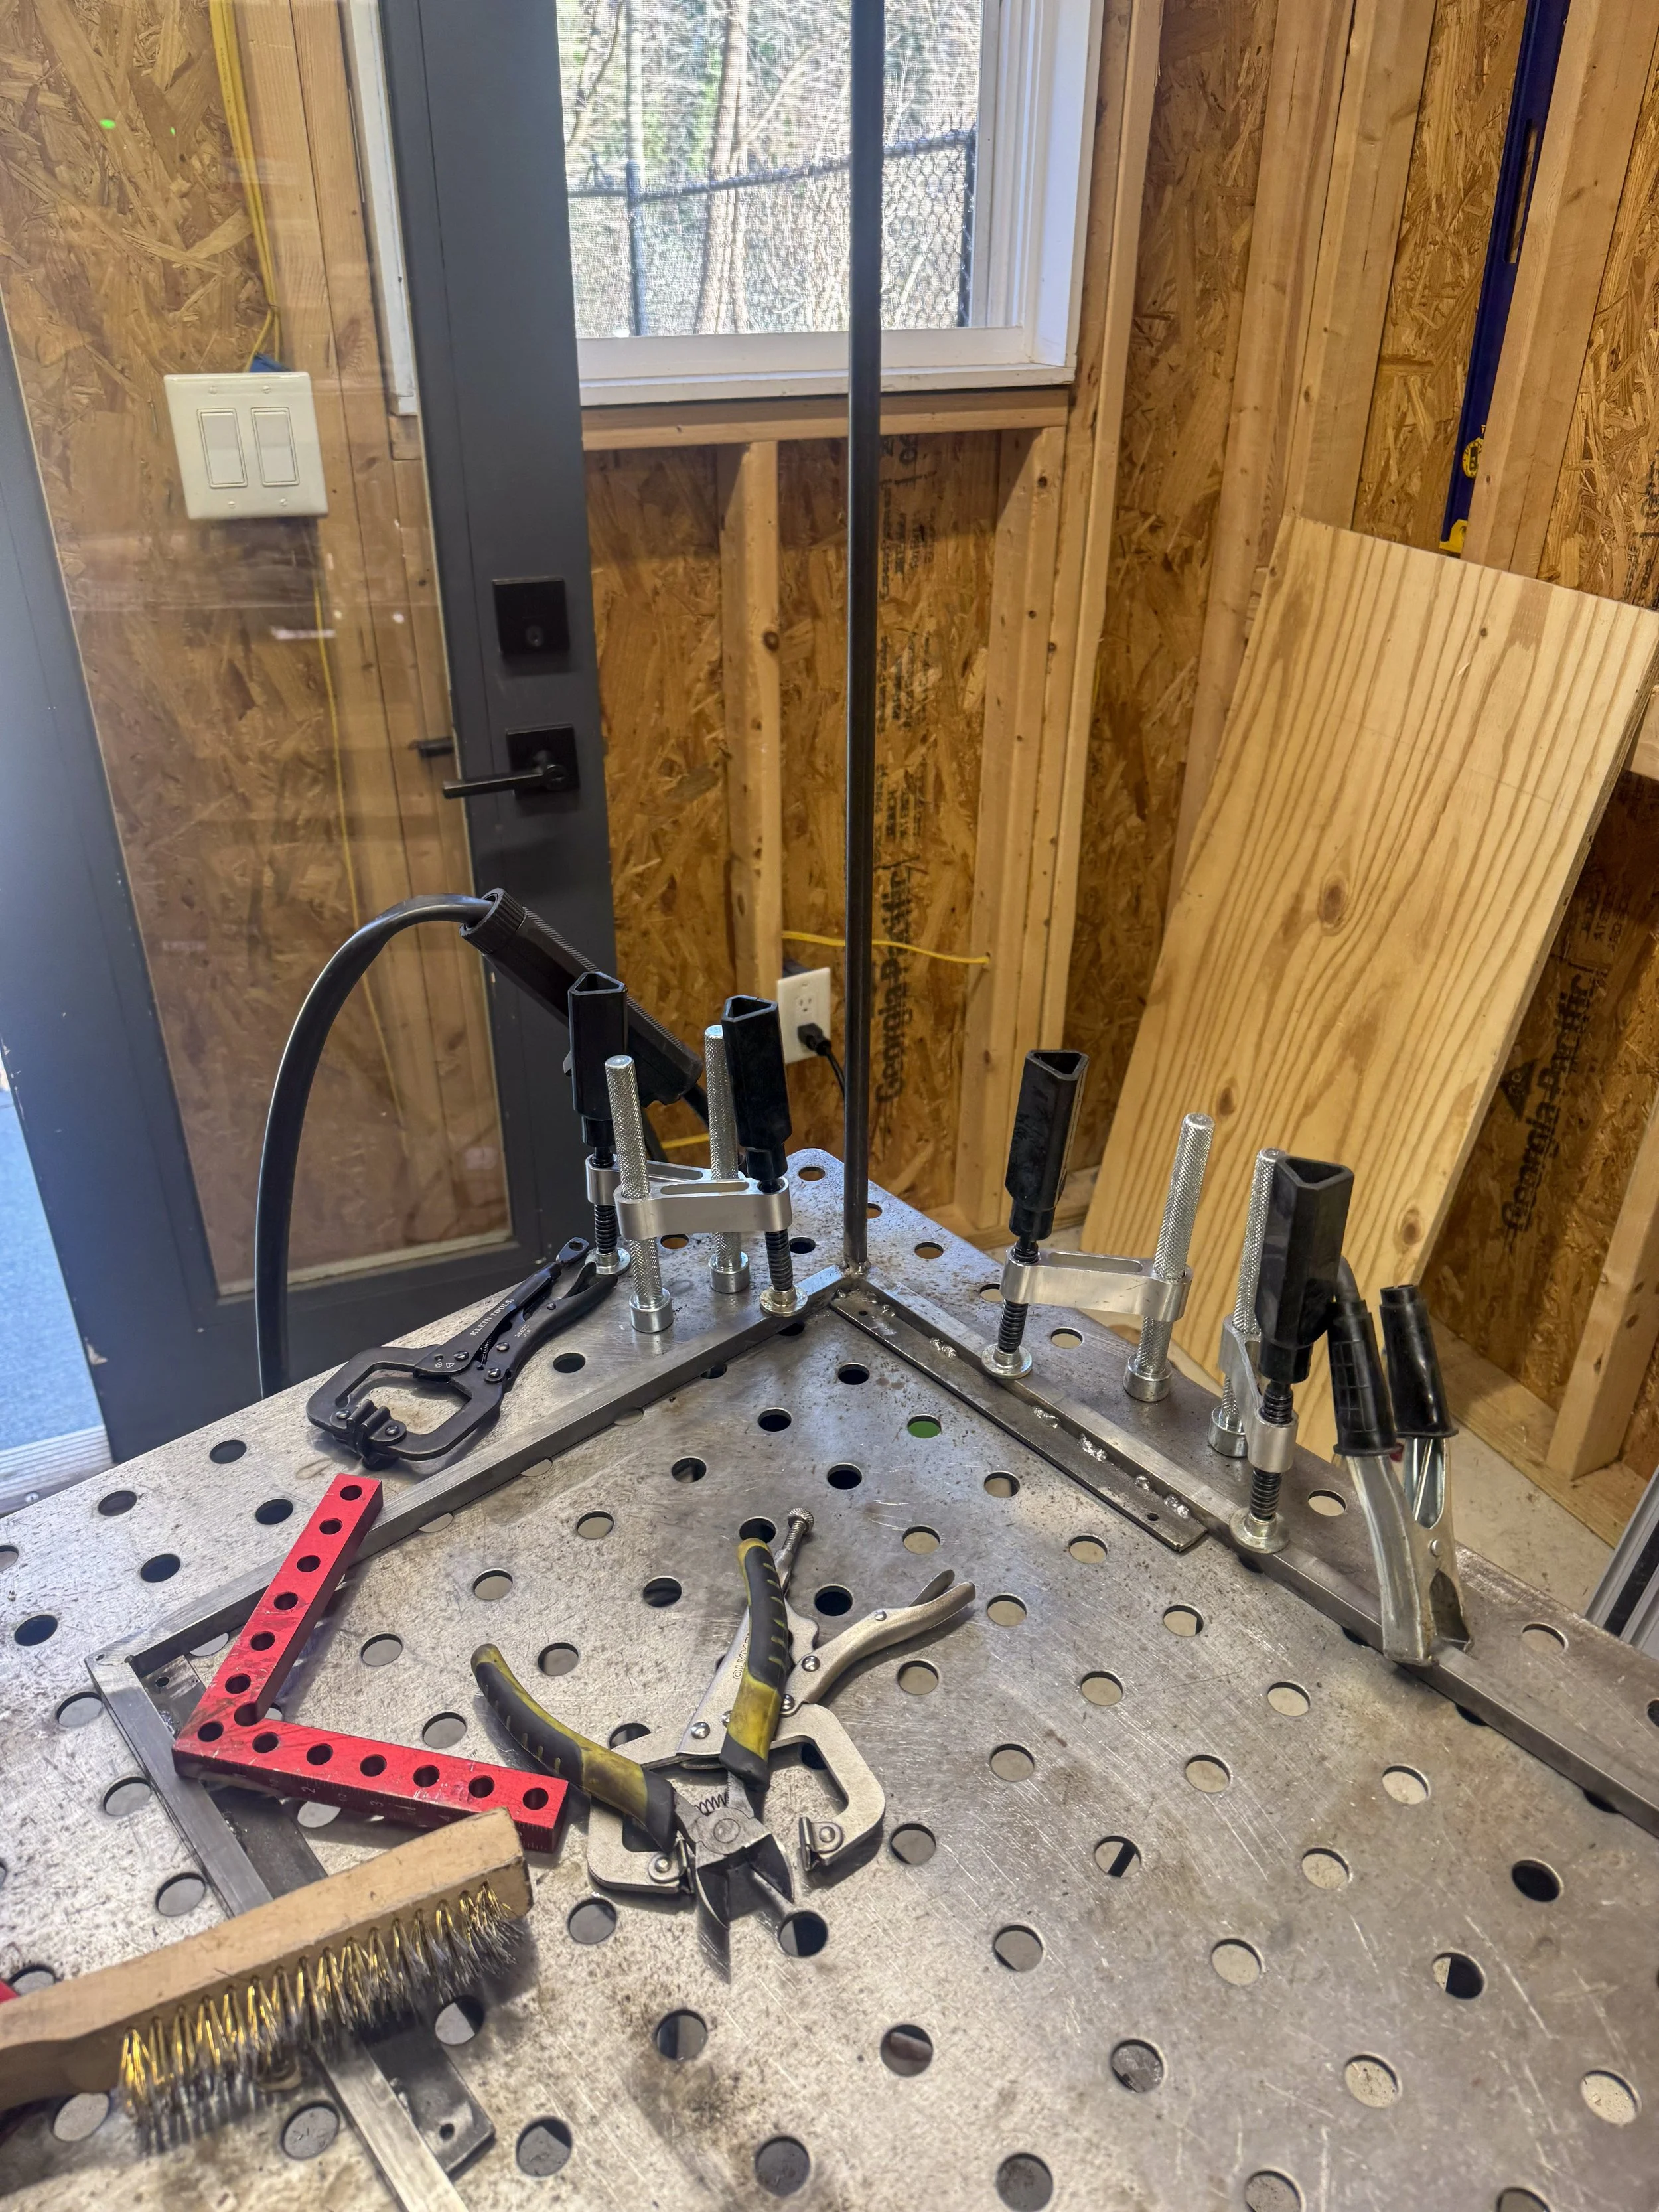
Attaching the legs was tricky. I stood two metal right angles vertically, clamped each leg against them, and tacked them in place. Then I finished the welds. Miraculously, the table came out level and wobble-free—a small victory.
With the legs set, I added the stretchers—two short bars front to back, and one long bar connecting the rear legs. Welding and fabrication took maybe an hour and a half over the course of two days.
Then came cleanup: flap disc on the grinder, followed by metal files for the details. I sanded the entire frame with 80-grit, wiped it down with acetone, and prepped it for paint.
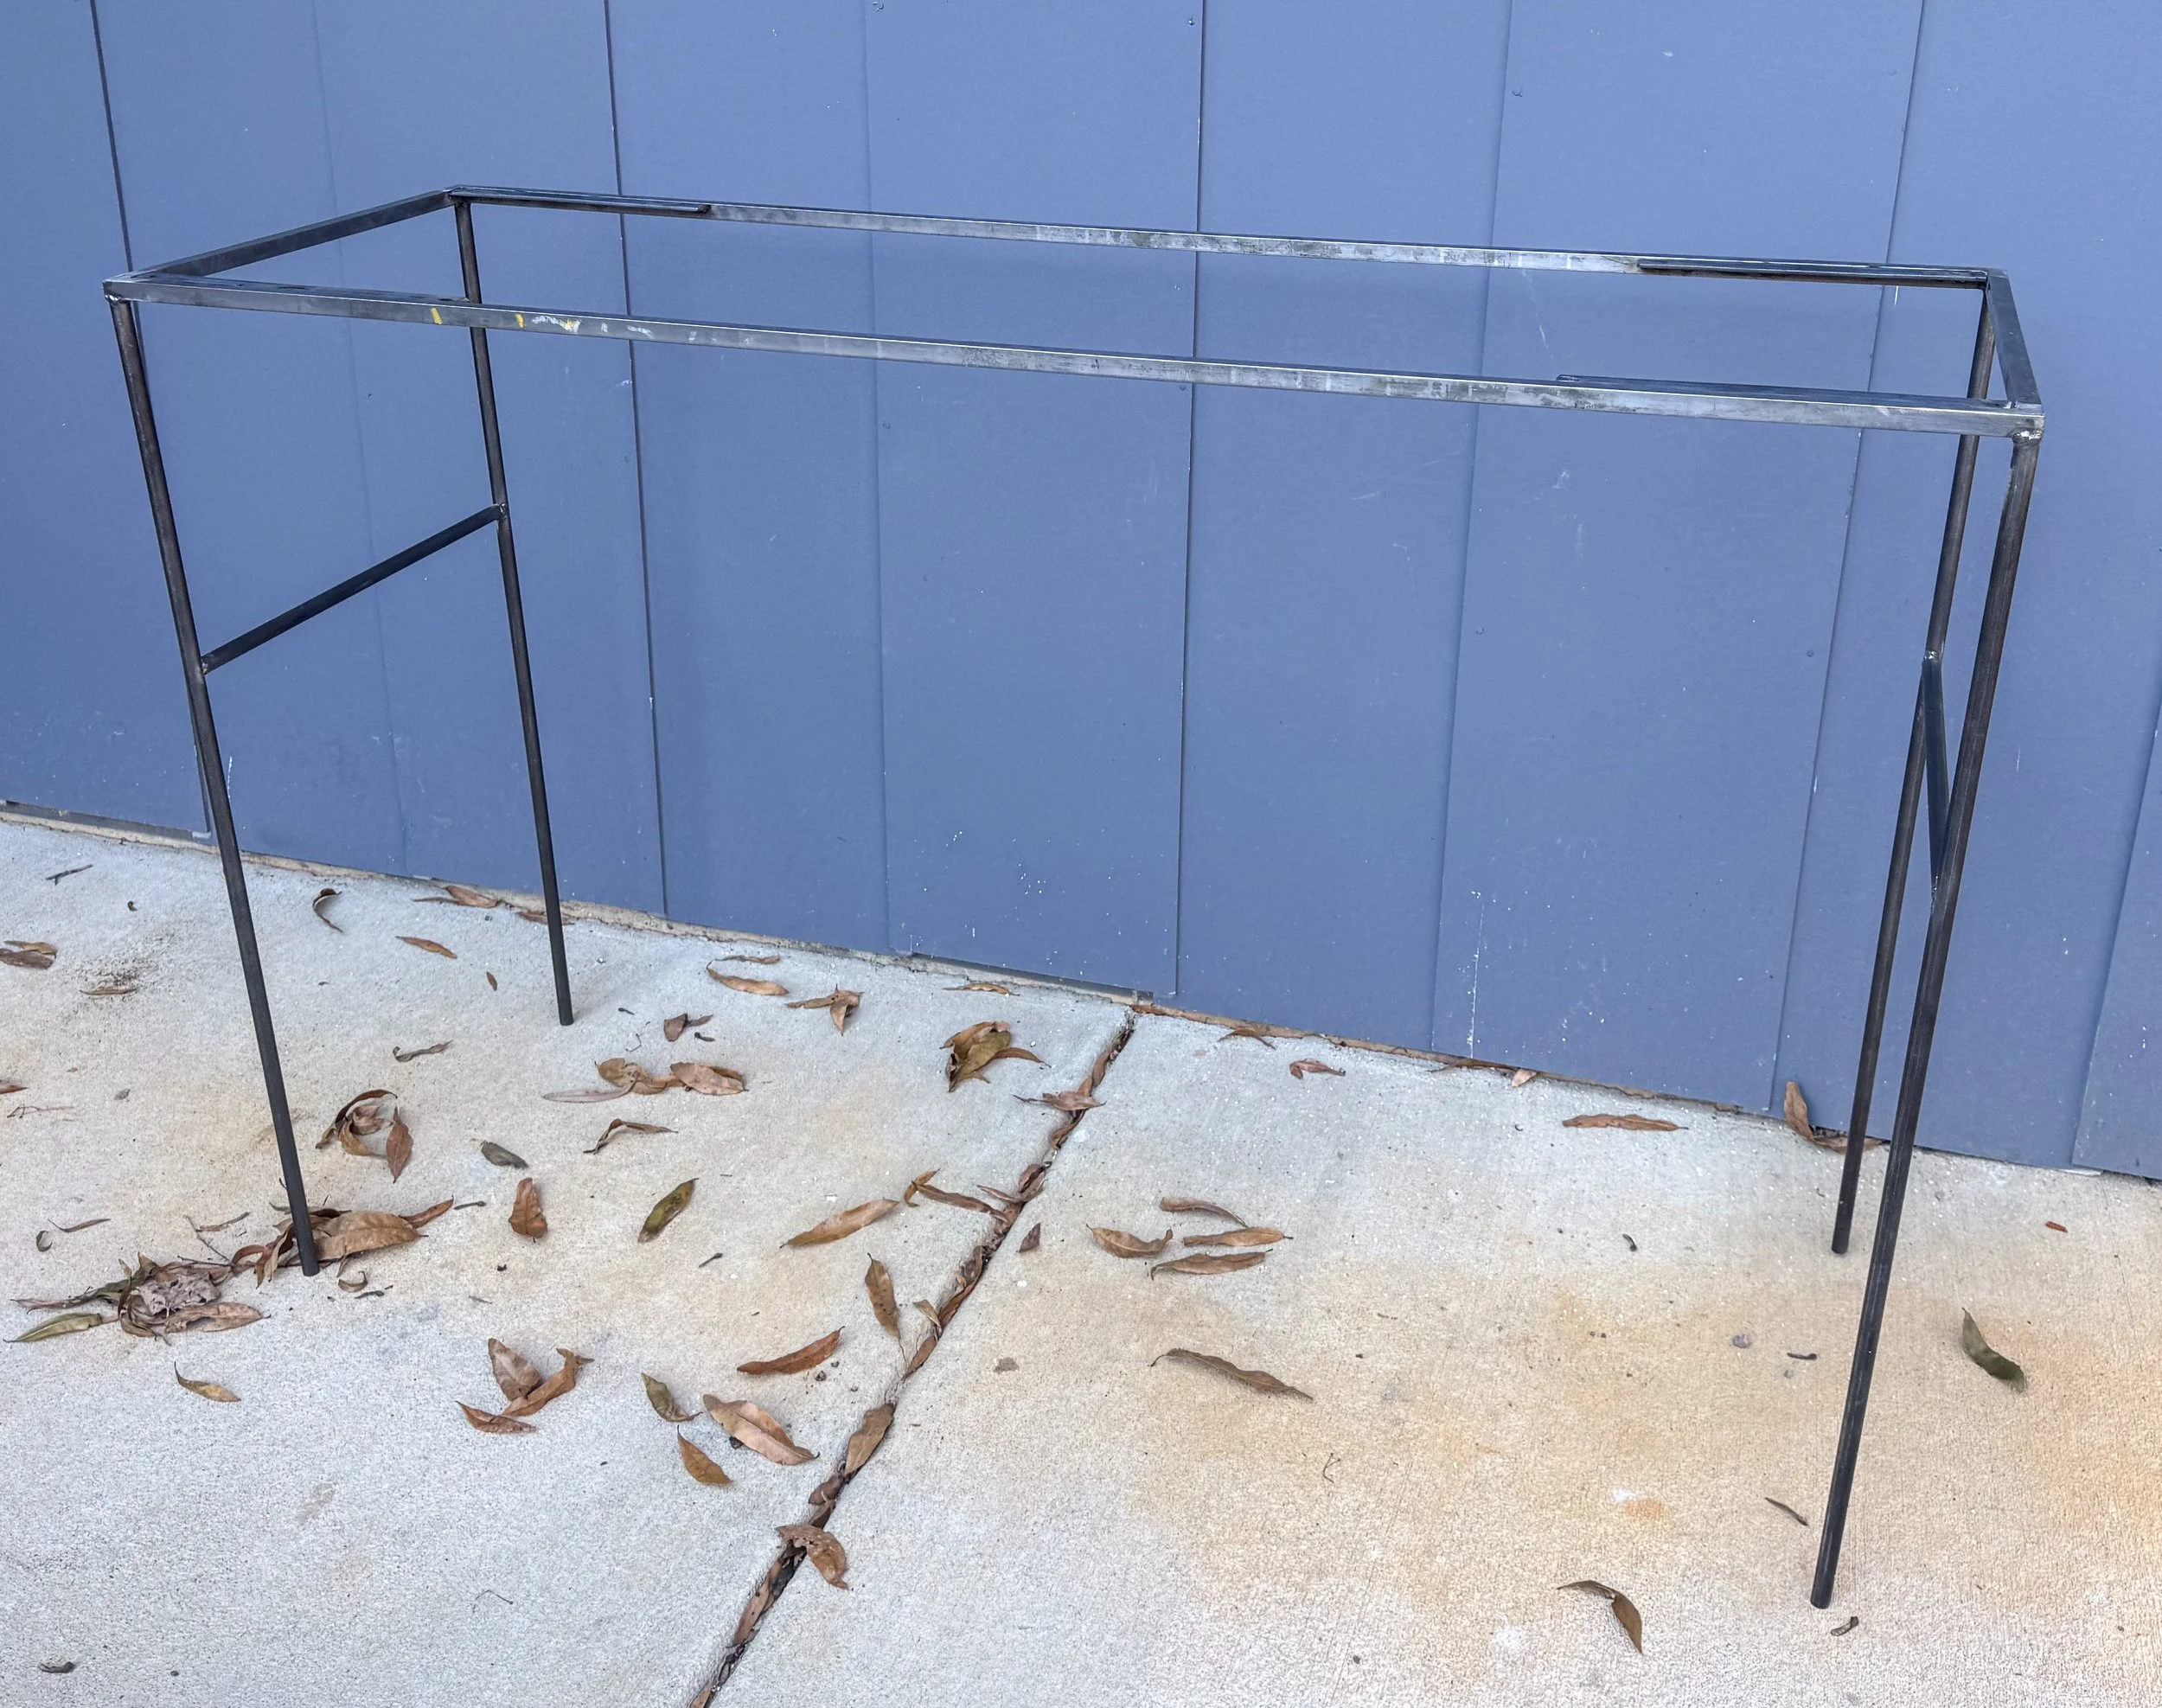
Painting took three days: one coat of white primer, followed by two coats of satin black—each spaced 24 hours apart. Here it is primed.
While the frame dried, I cut the plywood top with my Grizzly track saw. After clamping it to the frame, I pre-drilled the holes to match the mounting plates. The top was slightly askew, so I gave it a few passes with the hand plane until everything lined up just right.
Last step: edge banding. I clamped the top in my vise, grabbed a clothes iron, and slowly applied the maple veneer around the edge. Normally I love the look of exposed plywood, but this table has a certain refinement that called for a clean, finished edge.
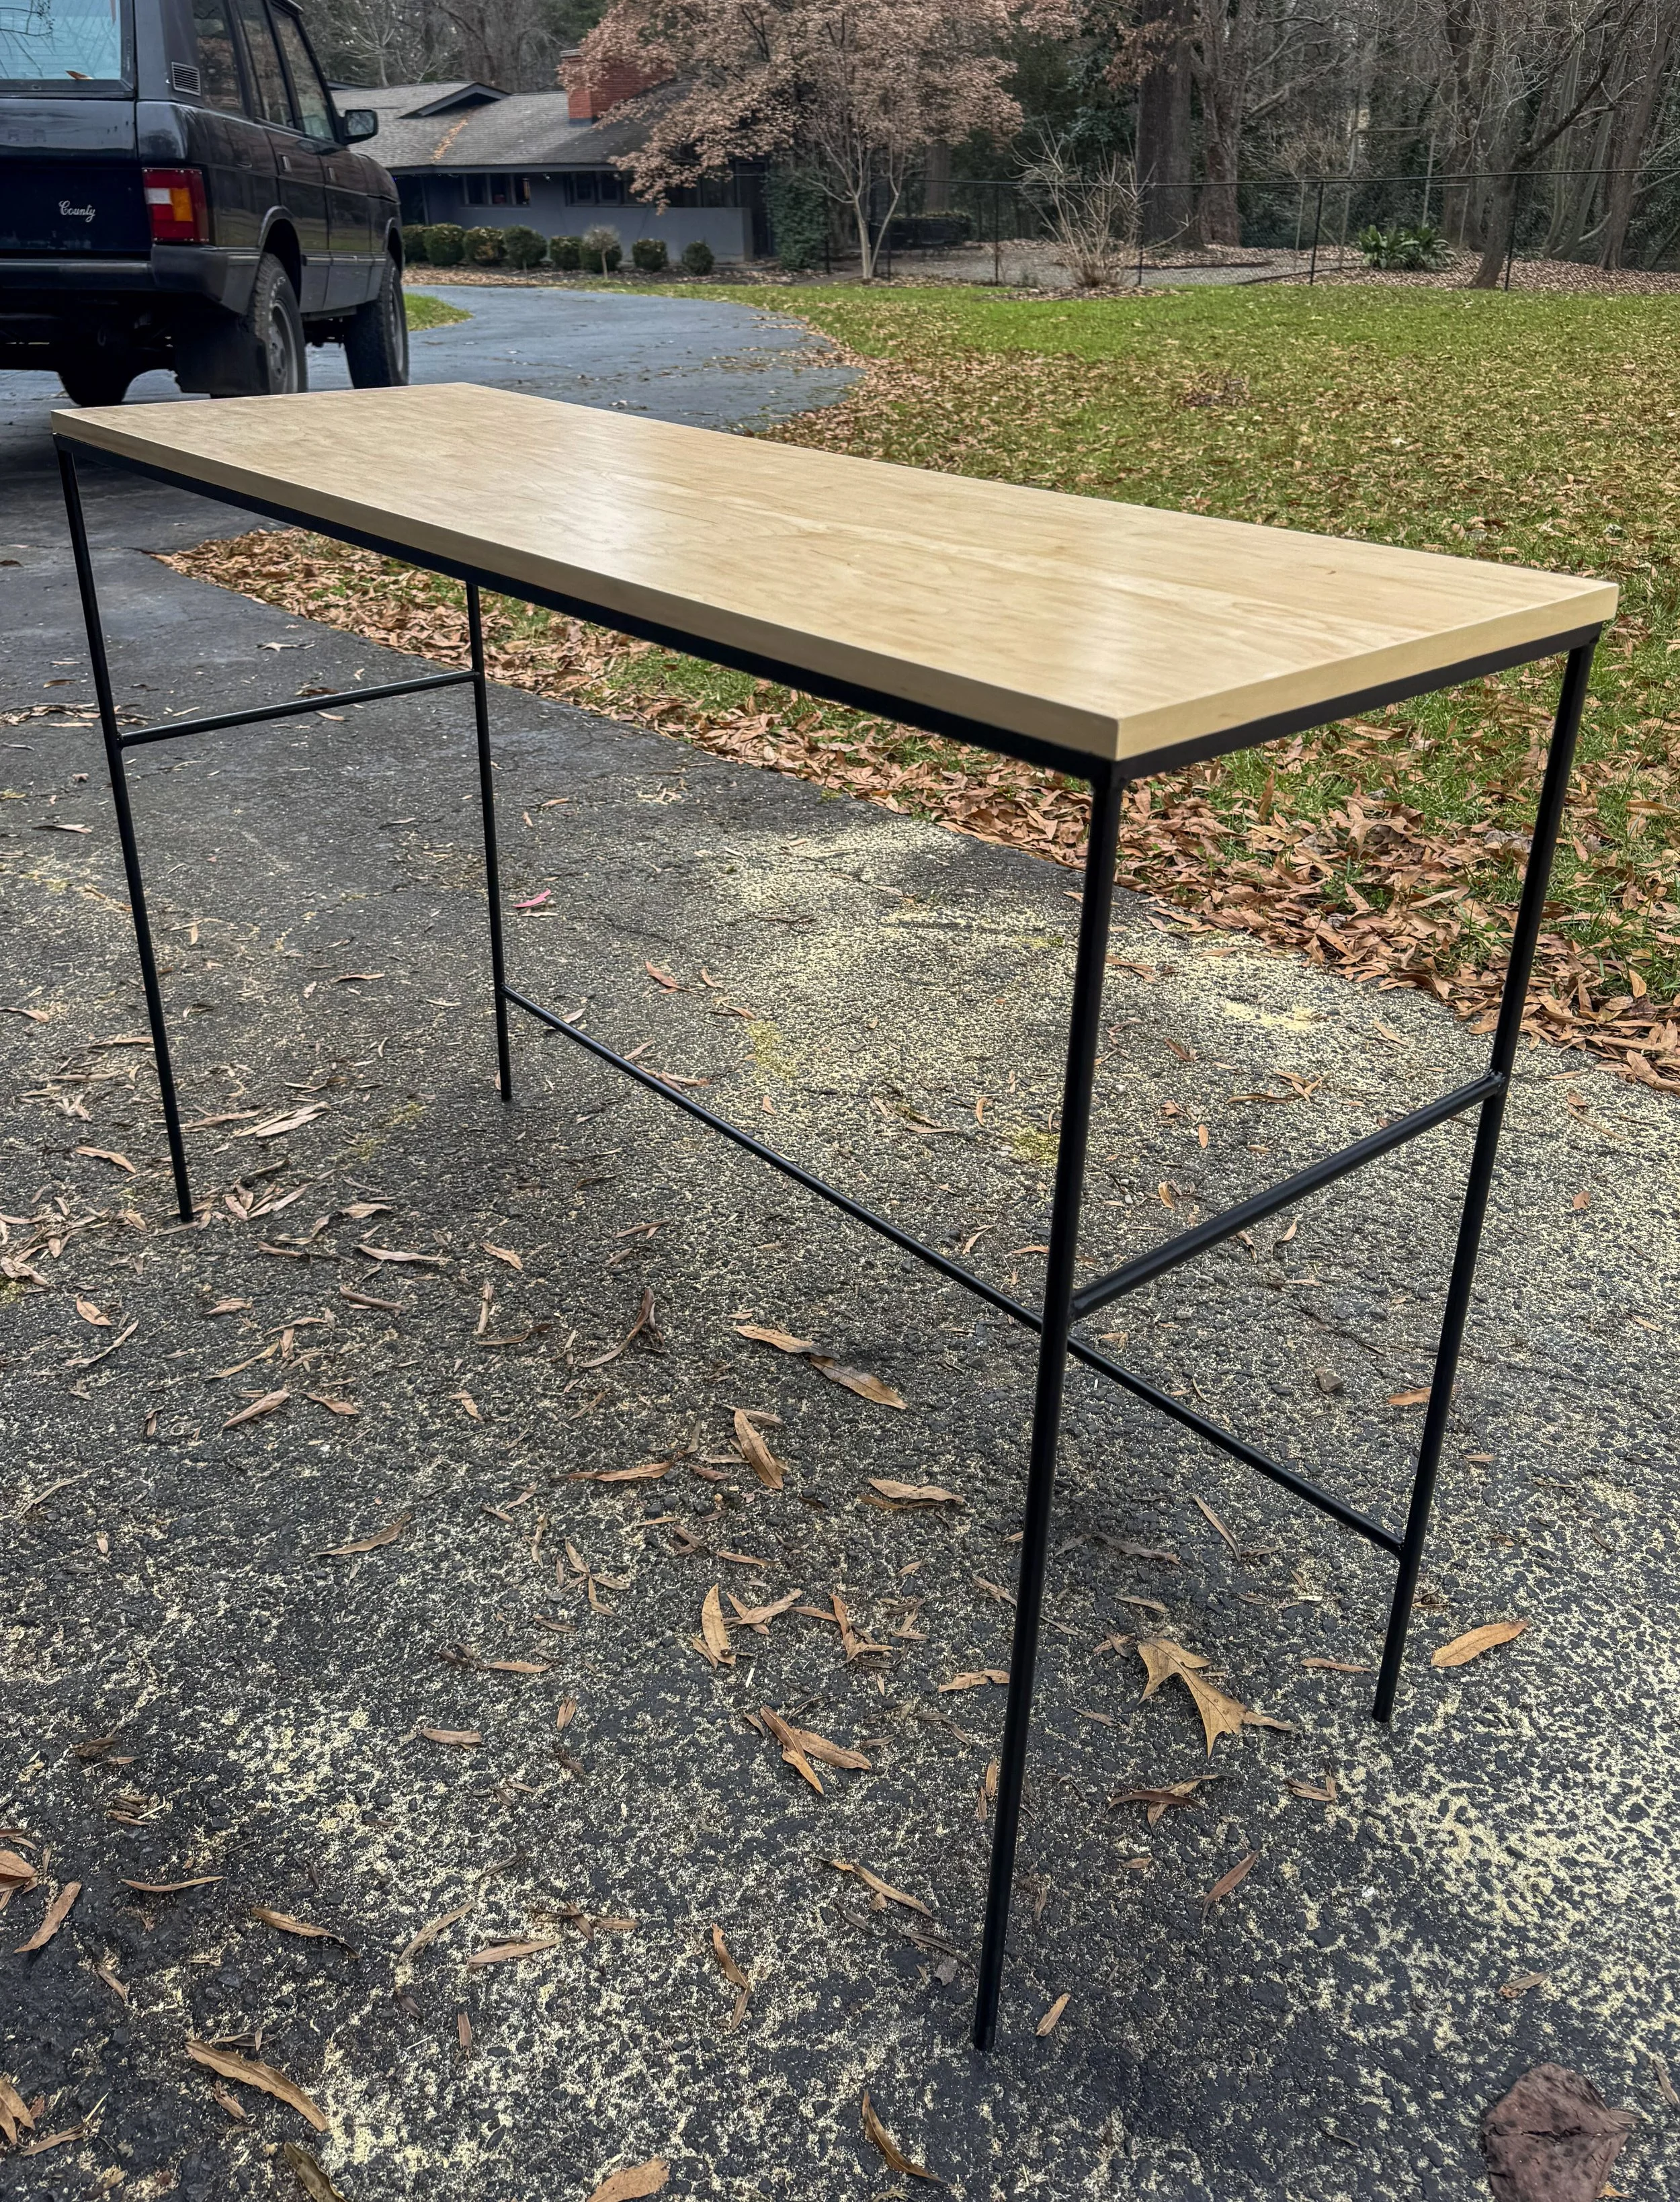
All told, the build took less than a week—most of that was just waiting for paint to cure. And the end result feels solid, useful, and distinctly mine.
The Final Product & Even Better Ifs
Overall, this was a fun and satisfying project—ideal for anyone with a bit of welding and woodworking know-how who’s looking to bring mid-century aesthetics into their space.
In our 1953 home, the table looks right at home. It carries a quiet authenticity that feels like it could’ve been here since day one.
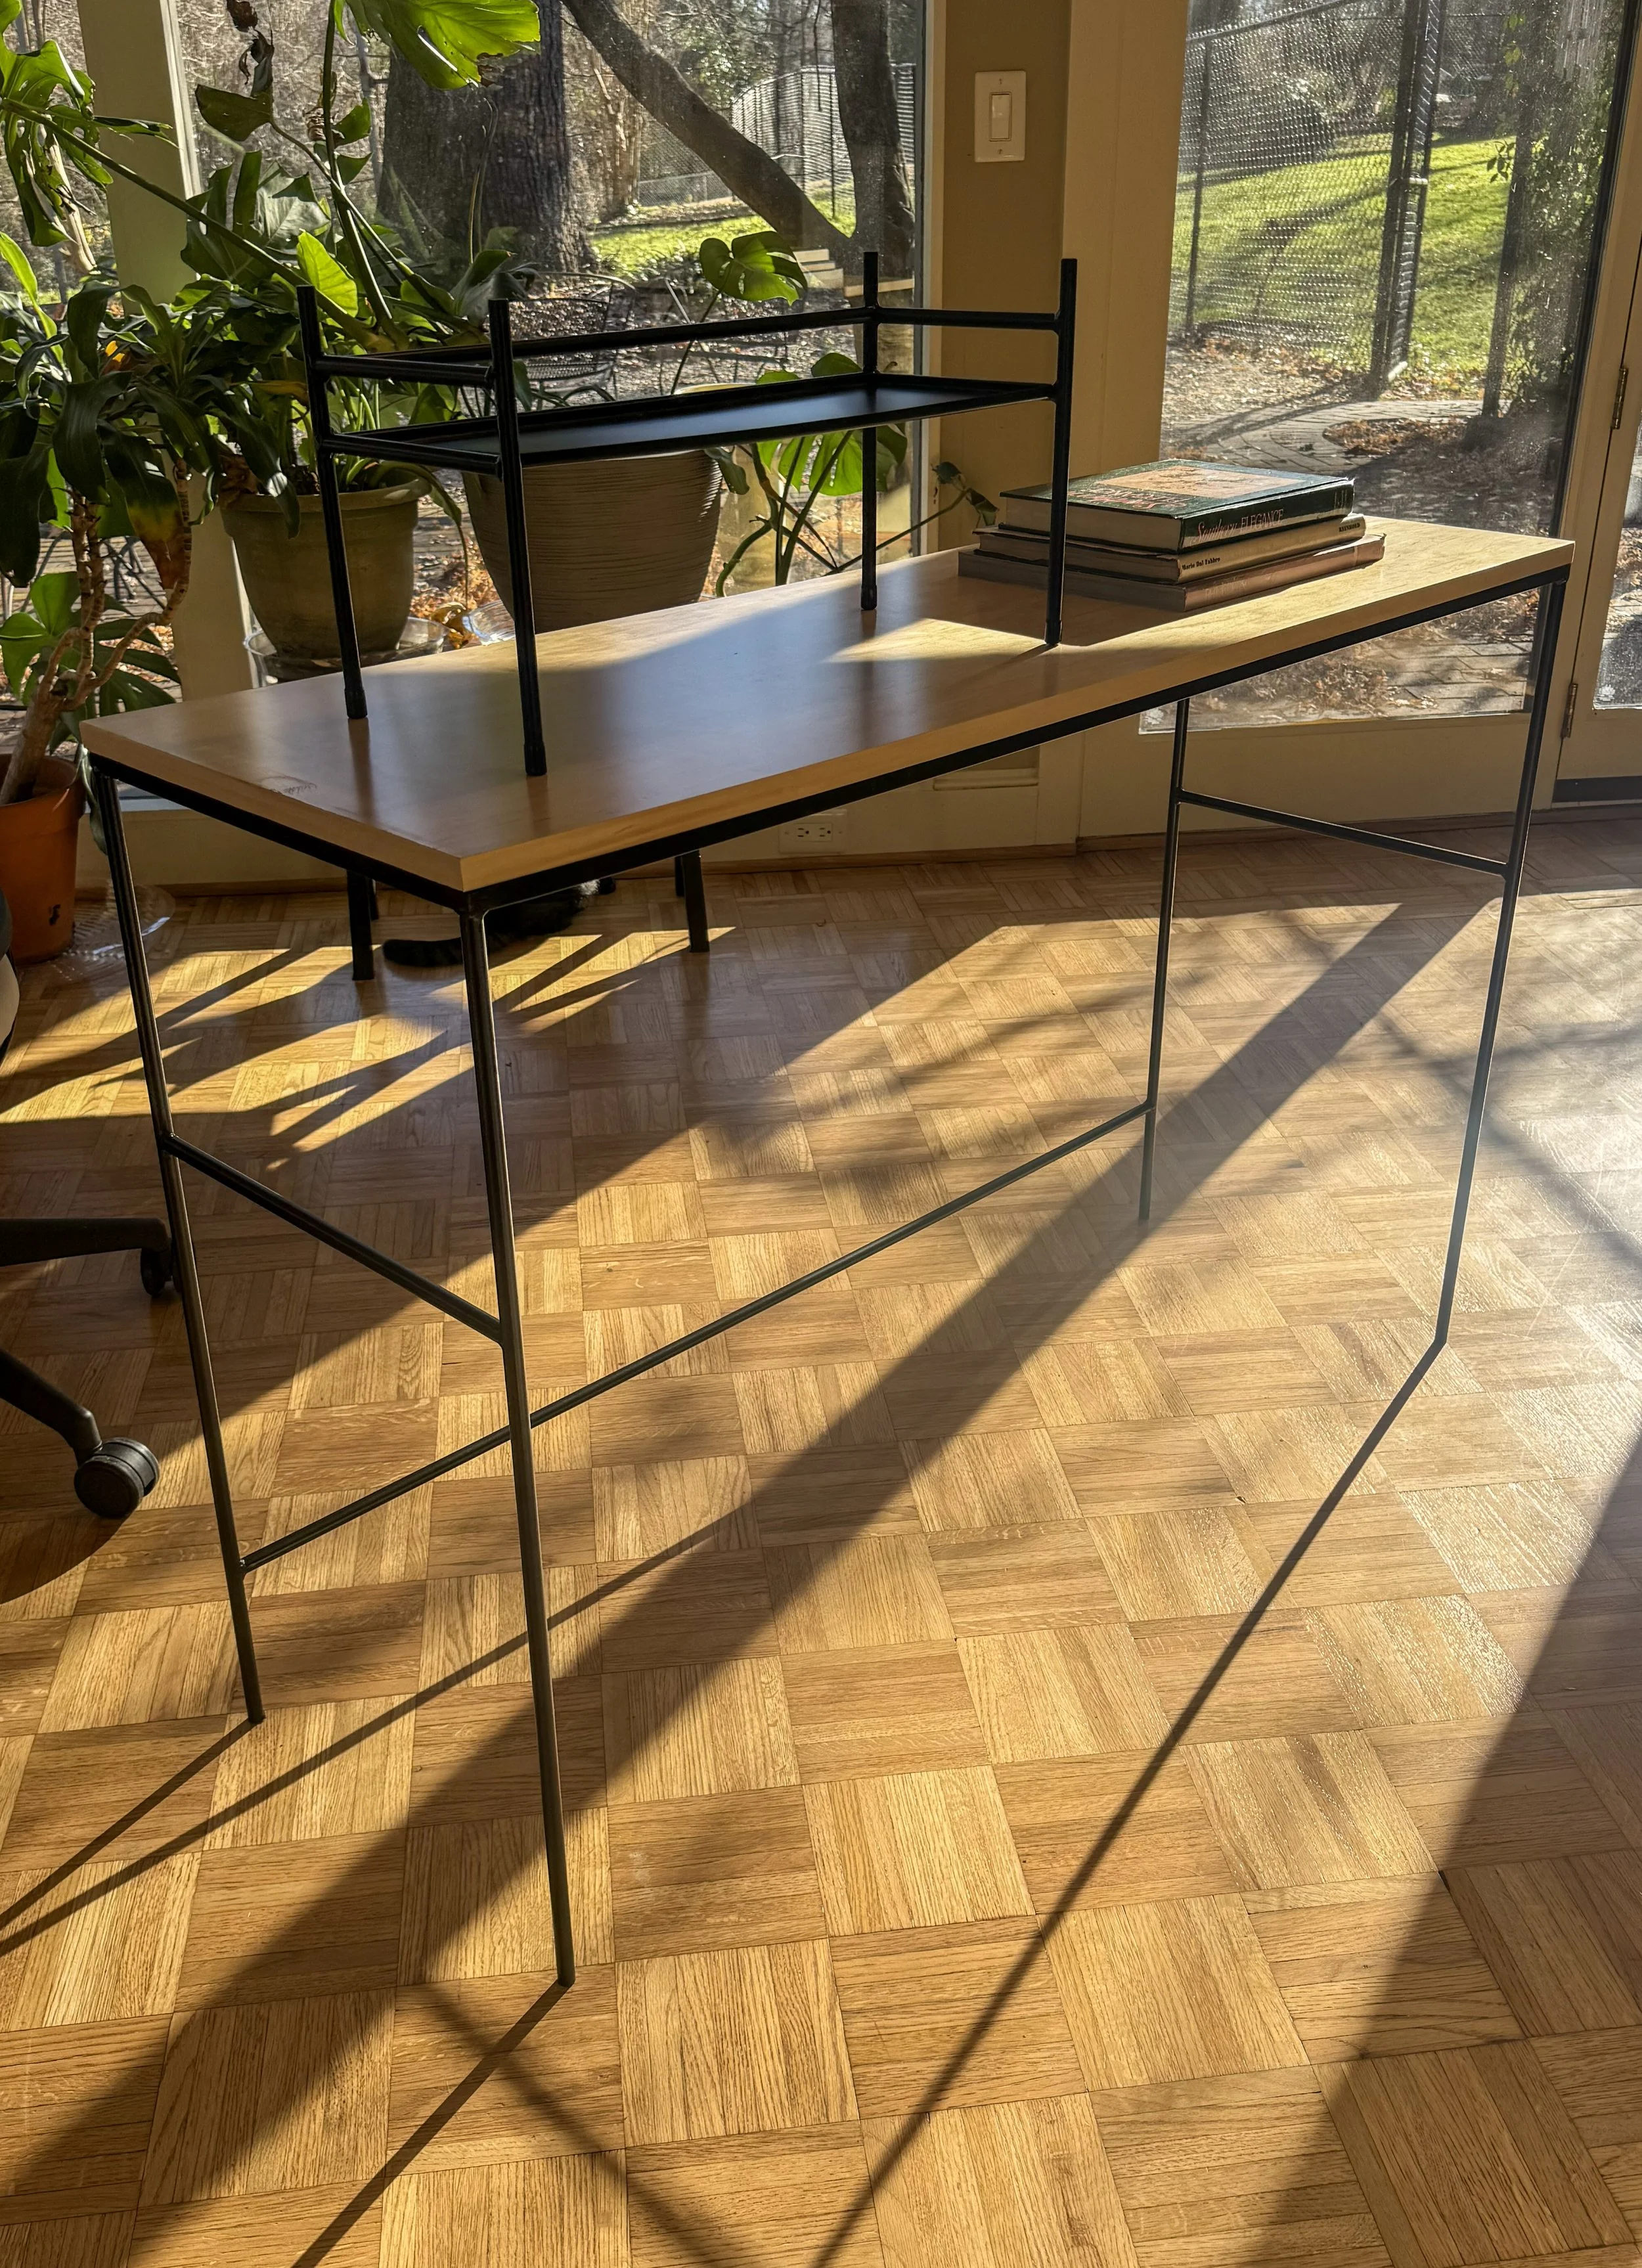
That said, if I were to build it again, I’d change a couple of things.
First, it’s probably two inches too tall. That gives it an awkward height—not quite console, not quite side table, not quite the height of any of piece of furniture in my house.
Second, it could use a bit more shear strength. While the table is level and steady, it does have a slight flex when pushed side-to-side. I think this could be improved by shortening the stretchers and welding under tension, or by adding a diagonal tensile cross-brace. That might take away a bit of the table’s elegance, but it would reinforce the industrial look and stiffen up the frame.
Still, I’m proud of how it turned out. I hope this post was helpful—or at least sparked some ideas. If you’ve got the time, tools, and interest, this is a deeply satisfying build that delivers on both form and function.
